Spooky spider sashiko tote bag tutorial
What is your favourite thing about autumn?
Are you more of a pumpkin spice latte person, do you love curling up with a book and listening to the rain, or do you spend the whole year planning out your Halloween costume? I am a little bit of all three. My perfect October Sunday is spent with a warm tea and some snacks, working on craft projects while watching autumn-themed films. If this sounds like something you would enjoy, read on!
In this blog post, I will guide you through how to make a spooky (but fashionable!) Halloween tote bag, using the sashiko method from our Sashiko Repair kit. It is perfect to go treat or treating, or as a last-minute accessory to go to that night out you didn’t know was a costume party.
As for tea and film, this craft pairs very well with a mug of Earl Grey and a viewing of Stardust (2007).

You Will Need:
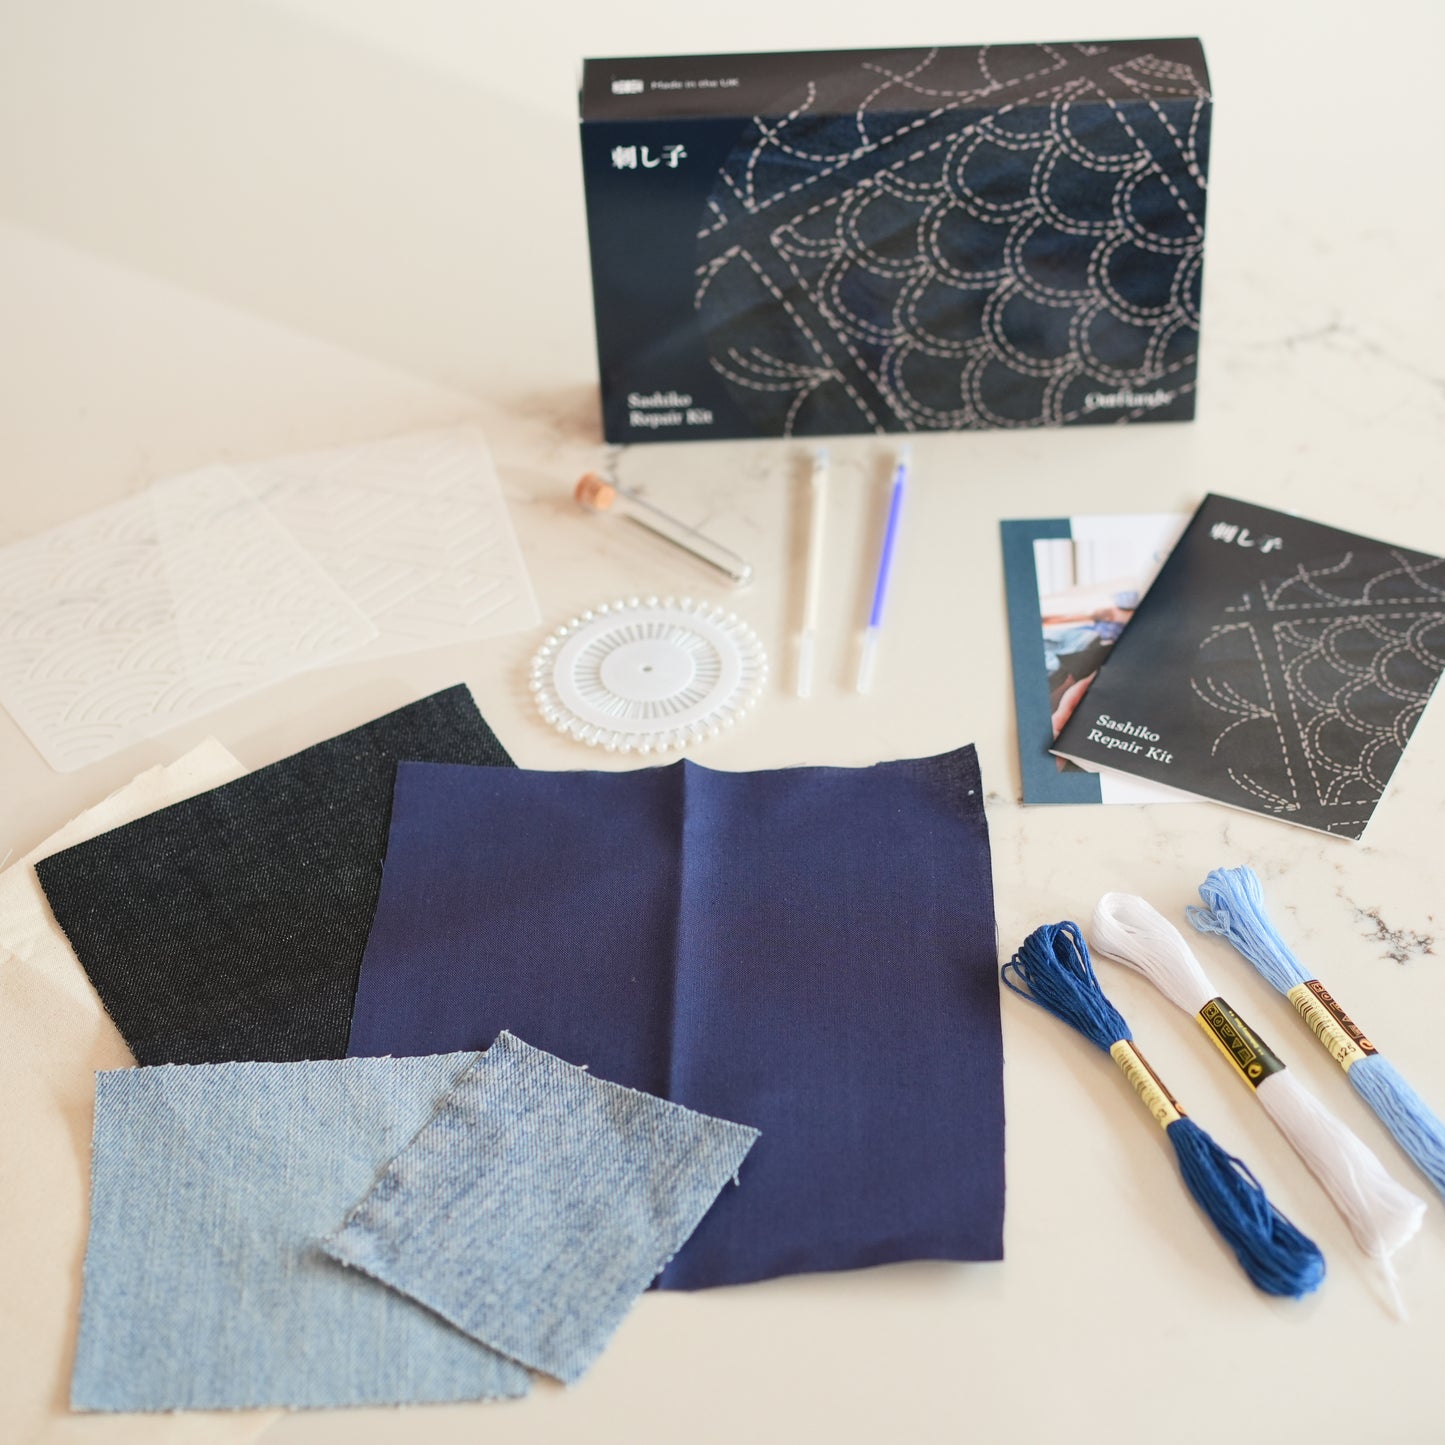
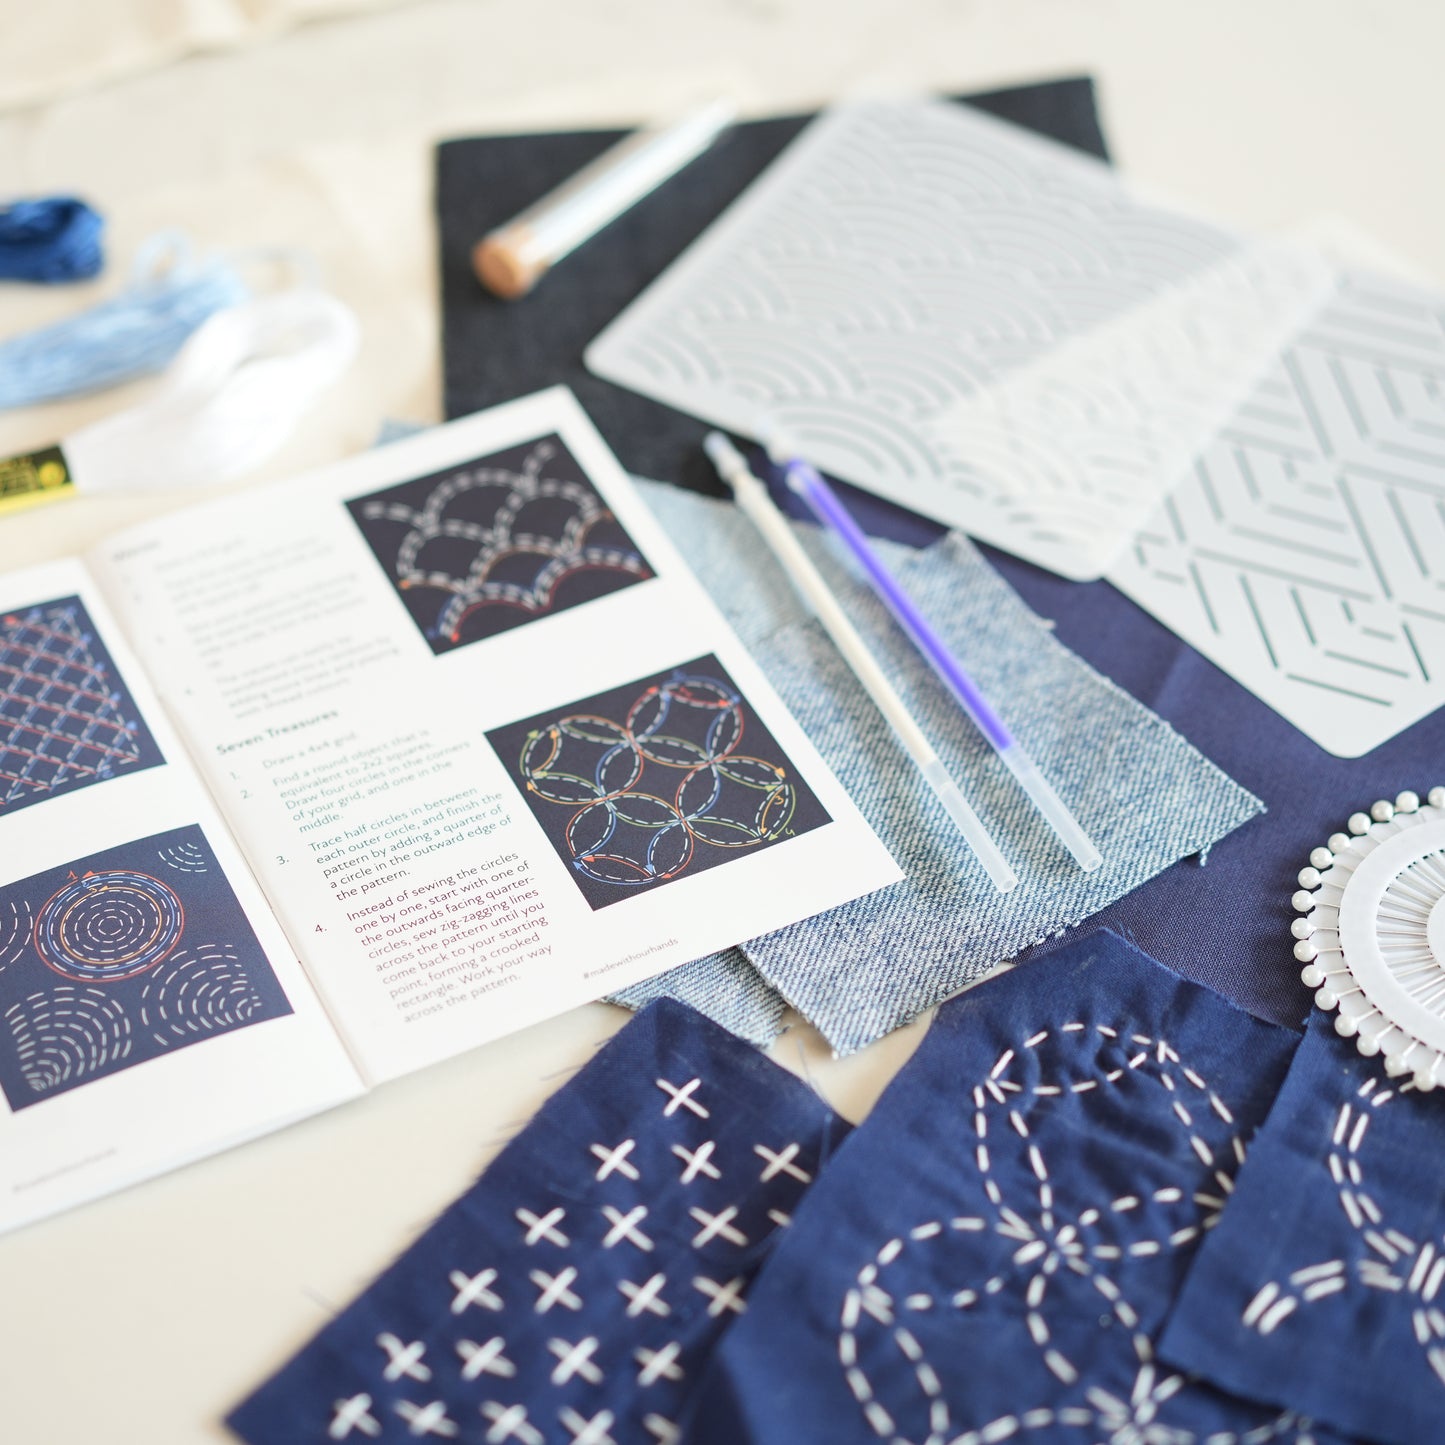
Most of what you will need can be found in our Sashiko Repair Kit, which is what I’ve used to create this!
- A blank tote bag
- A contrasting bit of fabric
- Some thread to match the colour of the tote bag
- Some thread to match the colour of the fabric
- A needle
- Sewing pins (optional but helpful!)
- A piece of paper
- A pencil or some chalk
- A pair of scissors
- A ruler
- A piece of cardboard (optional)

Before You Start
This craft looks quite intricate but it is actually deceptively easy. All you need to remember is to always plan the next step carefully. If you make a mistake, don’t panic! Step away from the craft for a bit. You will come back to it with fresh eyes and, most of the time, you will get an idea on how to fix things. Remember, mindful crafting is the goal.
With crafting, it is very easy to get carried away. I always recommend doing a little bit of prep work before getting started. Think of the following questions:
- How much space do you want the design to take on the tote bag? It might a good idea to draw a circle on the tote bag using your pencil or chalk and a plate. You don’t have to think of it as a strict outline, but it will make it easier to plan out your craft.
- What do you want your spider and your web to look like? There are many different ways to draw a spider! From spooky to cute, with varying levels of detail, you have total control over the way you want your spider to look. Look up simplified drawings of spiders and webs until you find something you like and you think you can achieve.
- Which colours would you like to use? I’ve used the colour of our Sashiko Repair Kit - cream and indigo, but feel free to experiment! I recommend going for contrasting colours so the spiders and web are clearly visible, but you can go for a more subtle look by using colours that are close together.
Have you sketched out your spider and web design? Do you have all the material ready to go? Then let’s get started!

Sashiko Spider Tote Bag Tutorial
Part 1 - The Spider
- Draw your spider on a piece of paper. It needs to be as big as you want to spider on your tote bag to be.
- Cut the spider out. Try to be precise and to leave enough space between the legs so that each leg is clearly defined. Your future self will thank you.
- Place the cut-out spider on the tote bag and trace it.
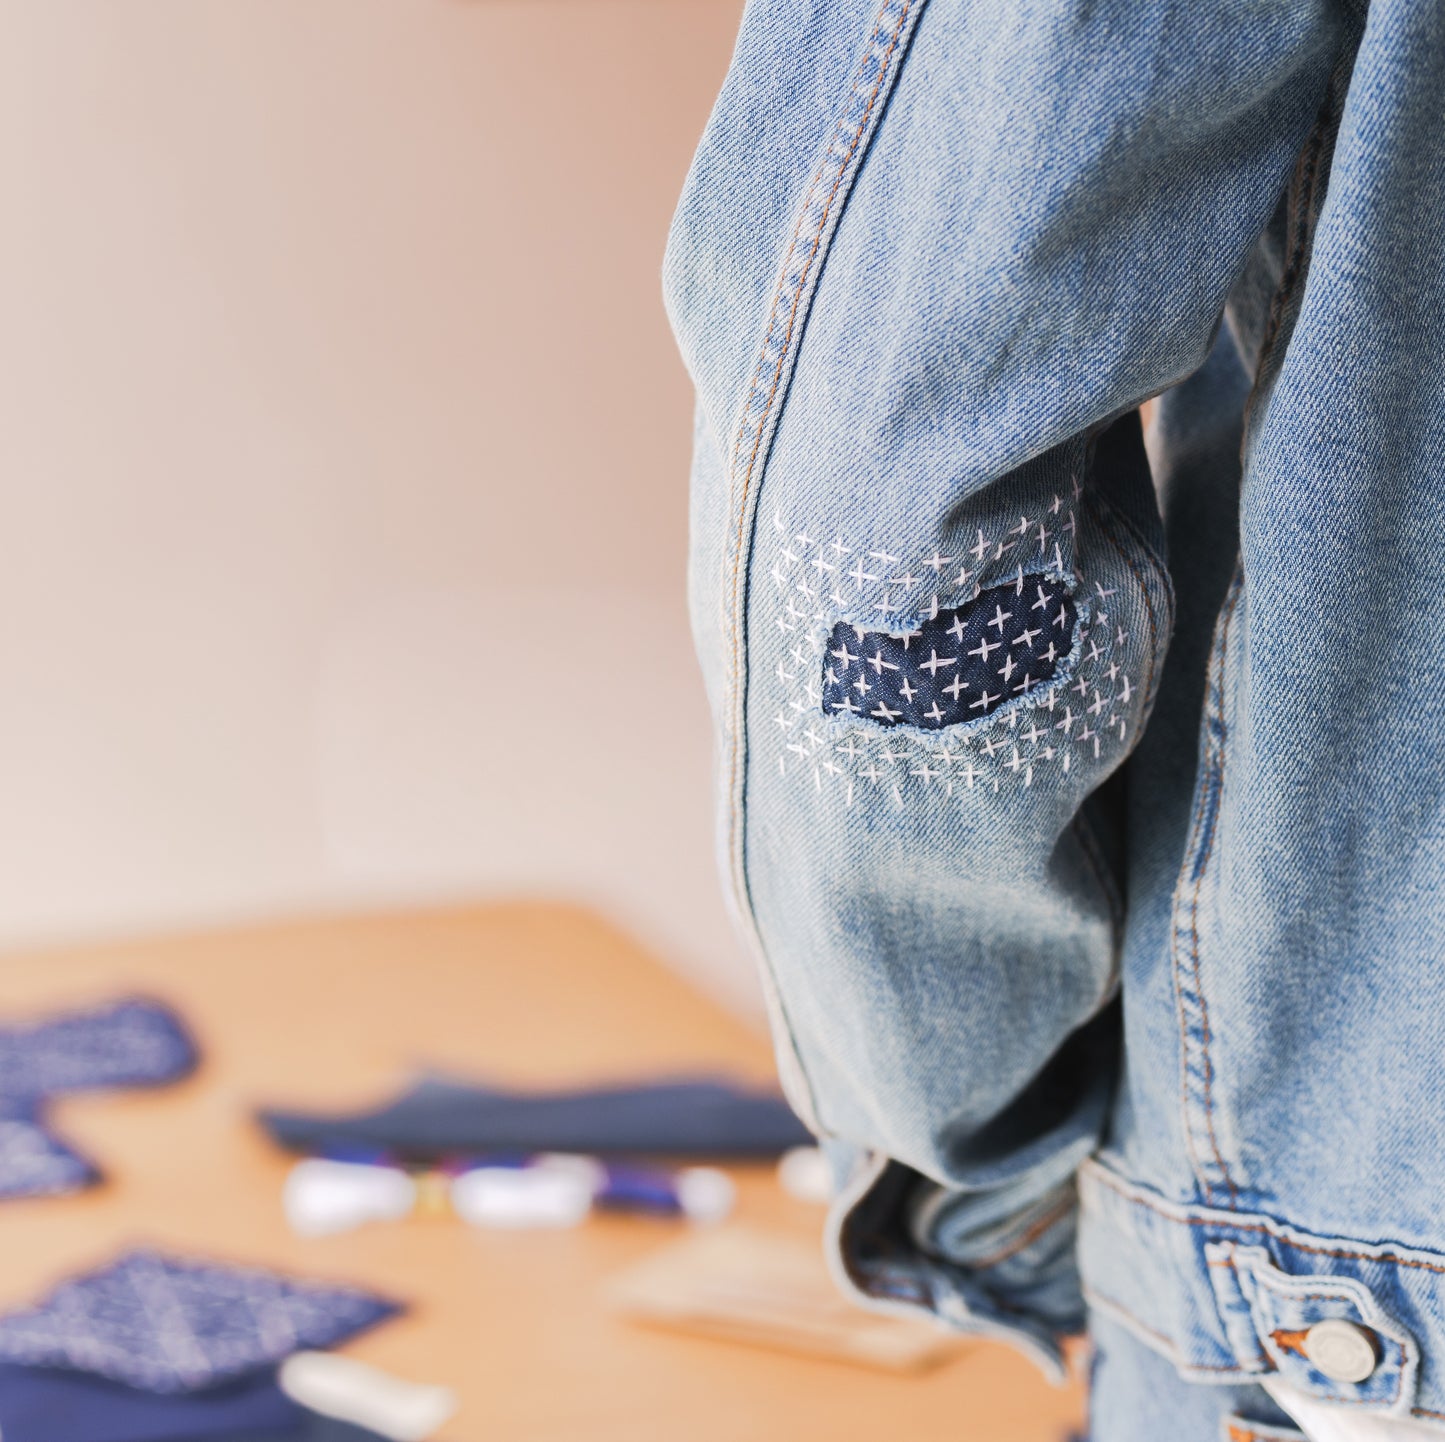
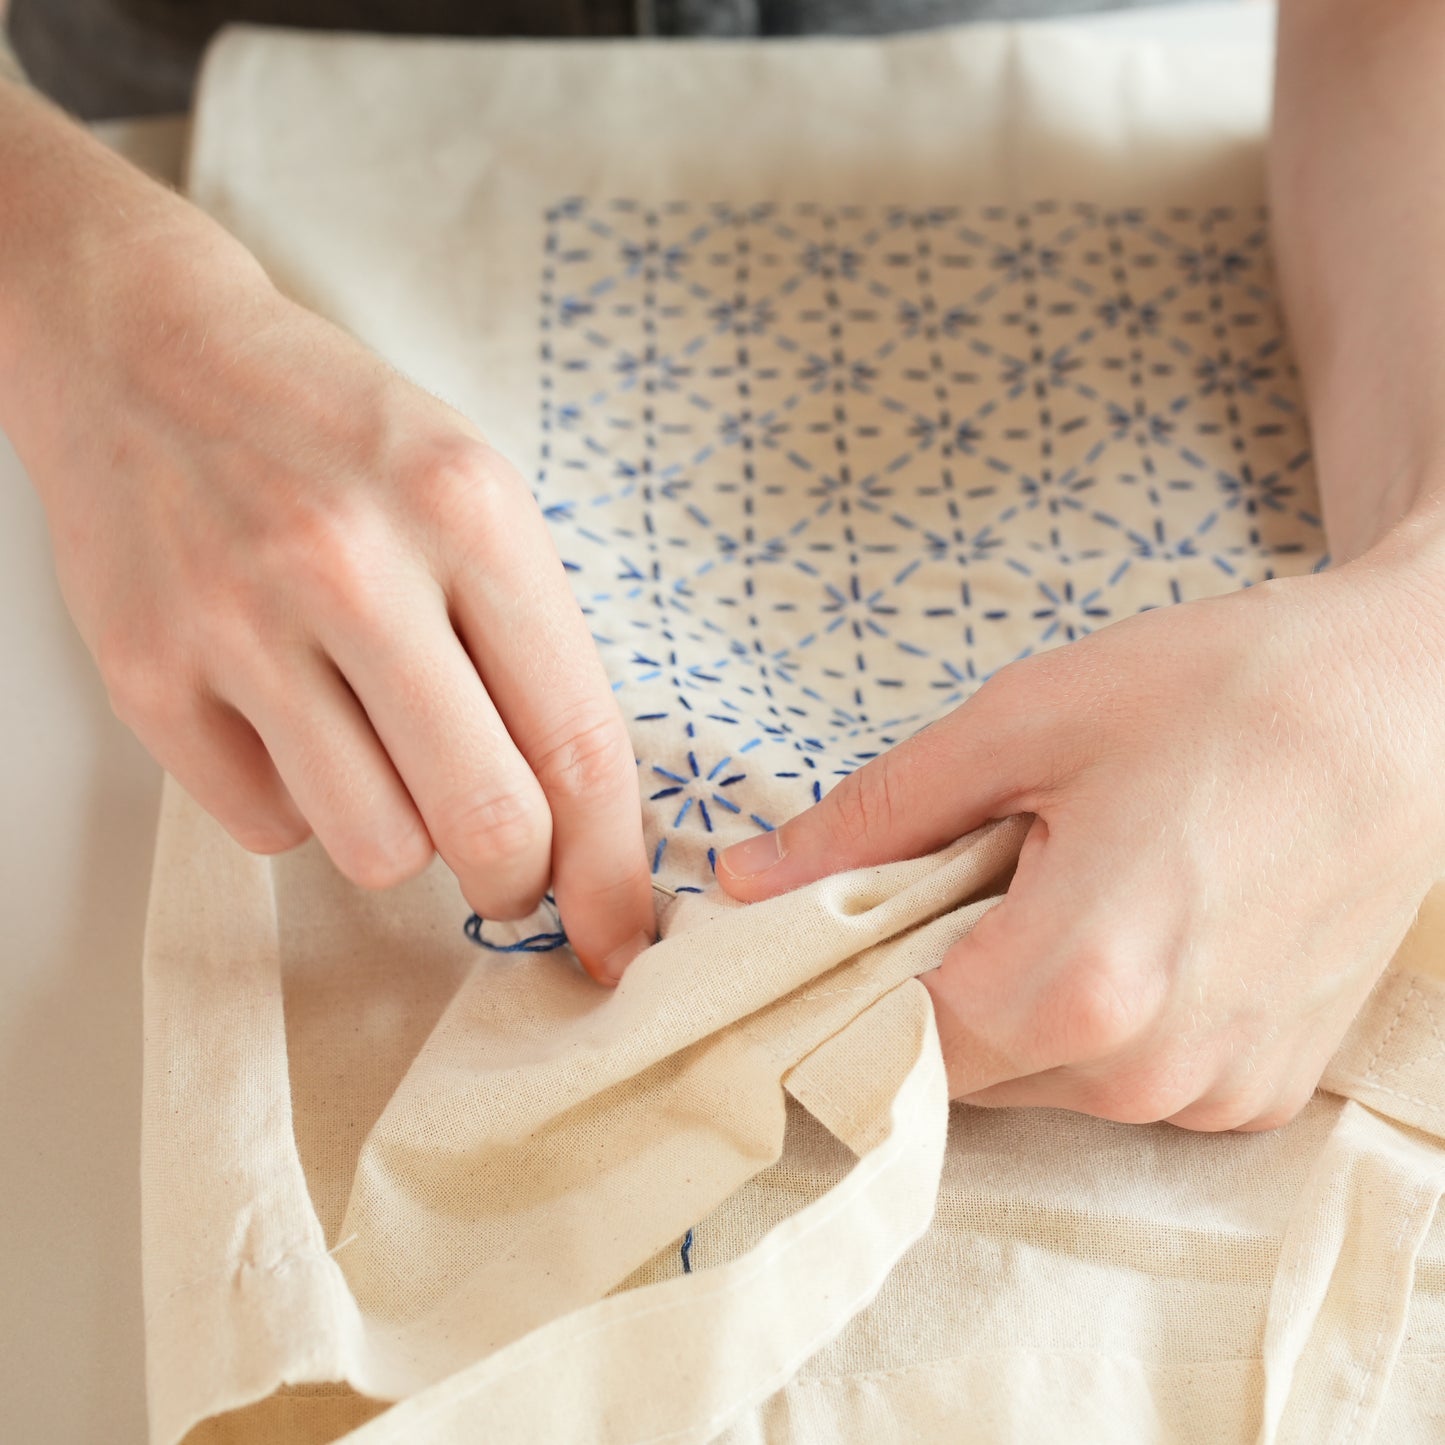
- Use a sharp pair of scissors to carefully cut out the traced spider in the face of the tote bag. Remember: it is always better to cut too little than too much! Be slow and considerate - you can always cut more out later.
- Once you are happy with your spider, place your chosen piece of fabric inside the tote bag. Use the contrasting colours to check whether your spider looks the way you want it to. Smooth out the details.
- If you’re worried about accidentally sewing your tote bag shut (we’ve all been there!), I recommend putting a piece of cardboard in it so your needle can’t get through. Better safe than sorry.
- If you have sewing pins, you can use them to pin the fabric to the tote bag so it won’t crease too much.
- Pick a colour of thread that is as close to the colour of the tote bag as possible and sew the edge of the spiders into the fabric so it keeps its shape. You want the stitches to be very short, so the thread is virtually invisible against the tote bag.
- Once you’re done, clean any bits of thread that might cling to the tote bag. You can add stitches if bits of fabric are looking loose.
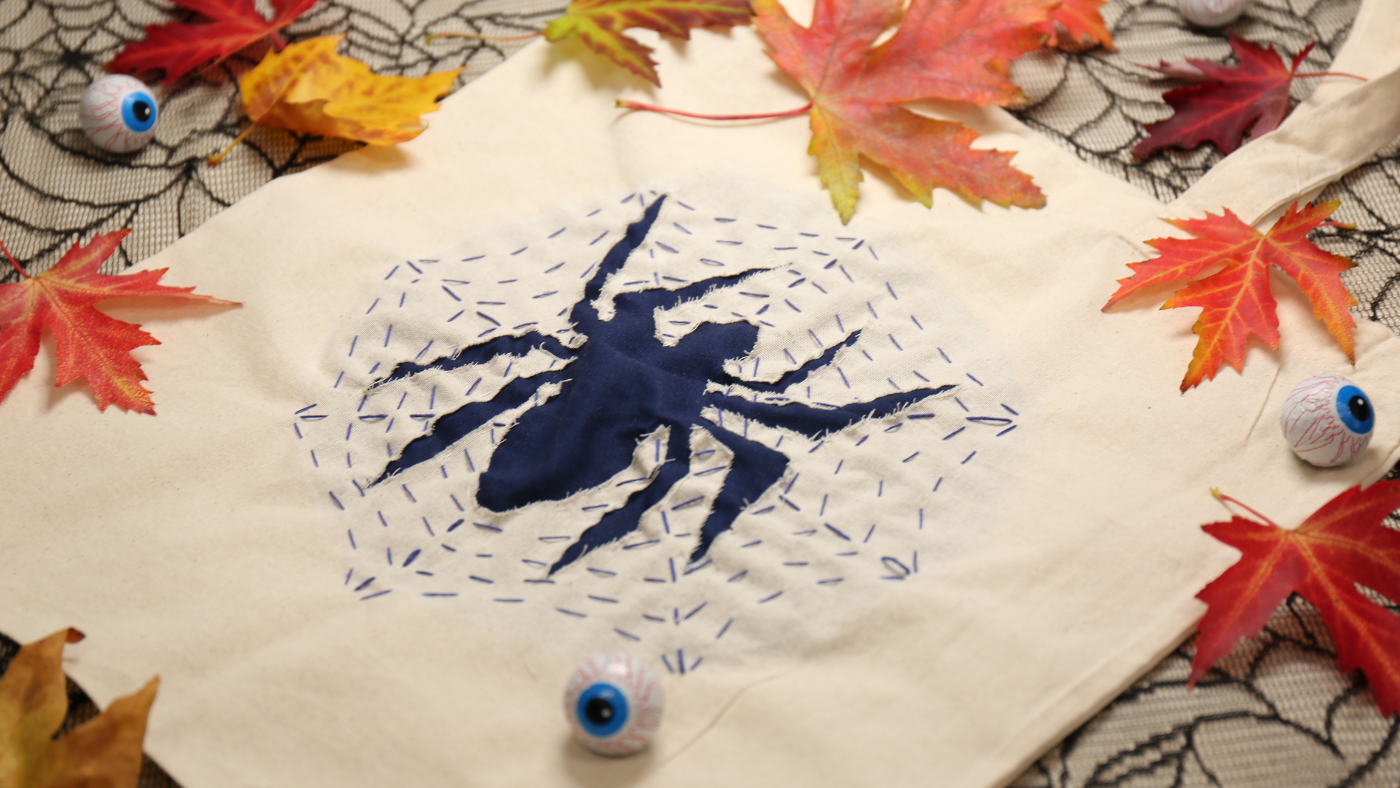
- Admire your little spider. Have you given it a name? Mine is called Sylvie.
Part 2 - The Web
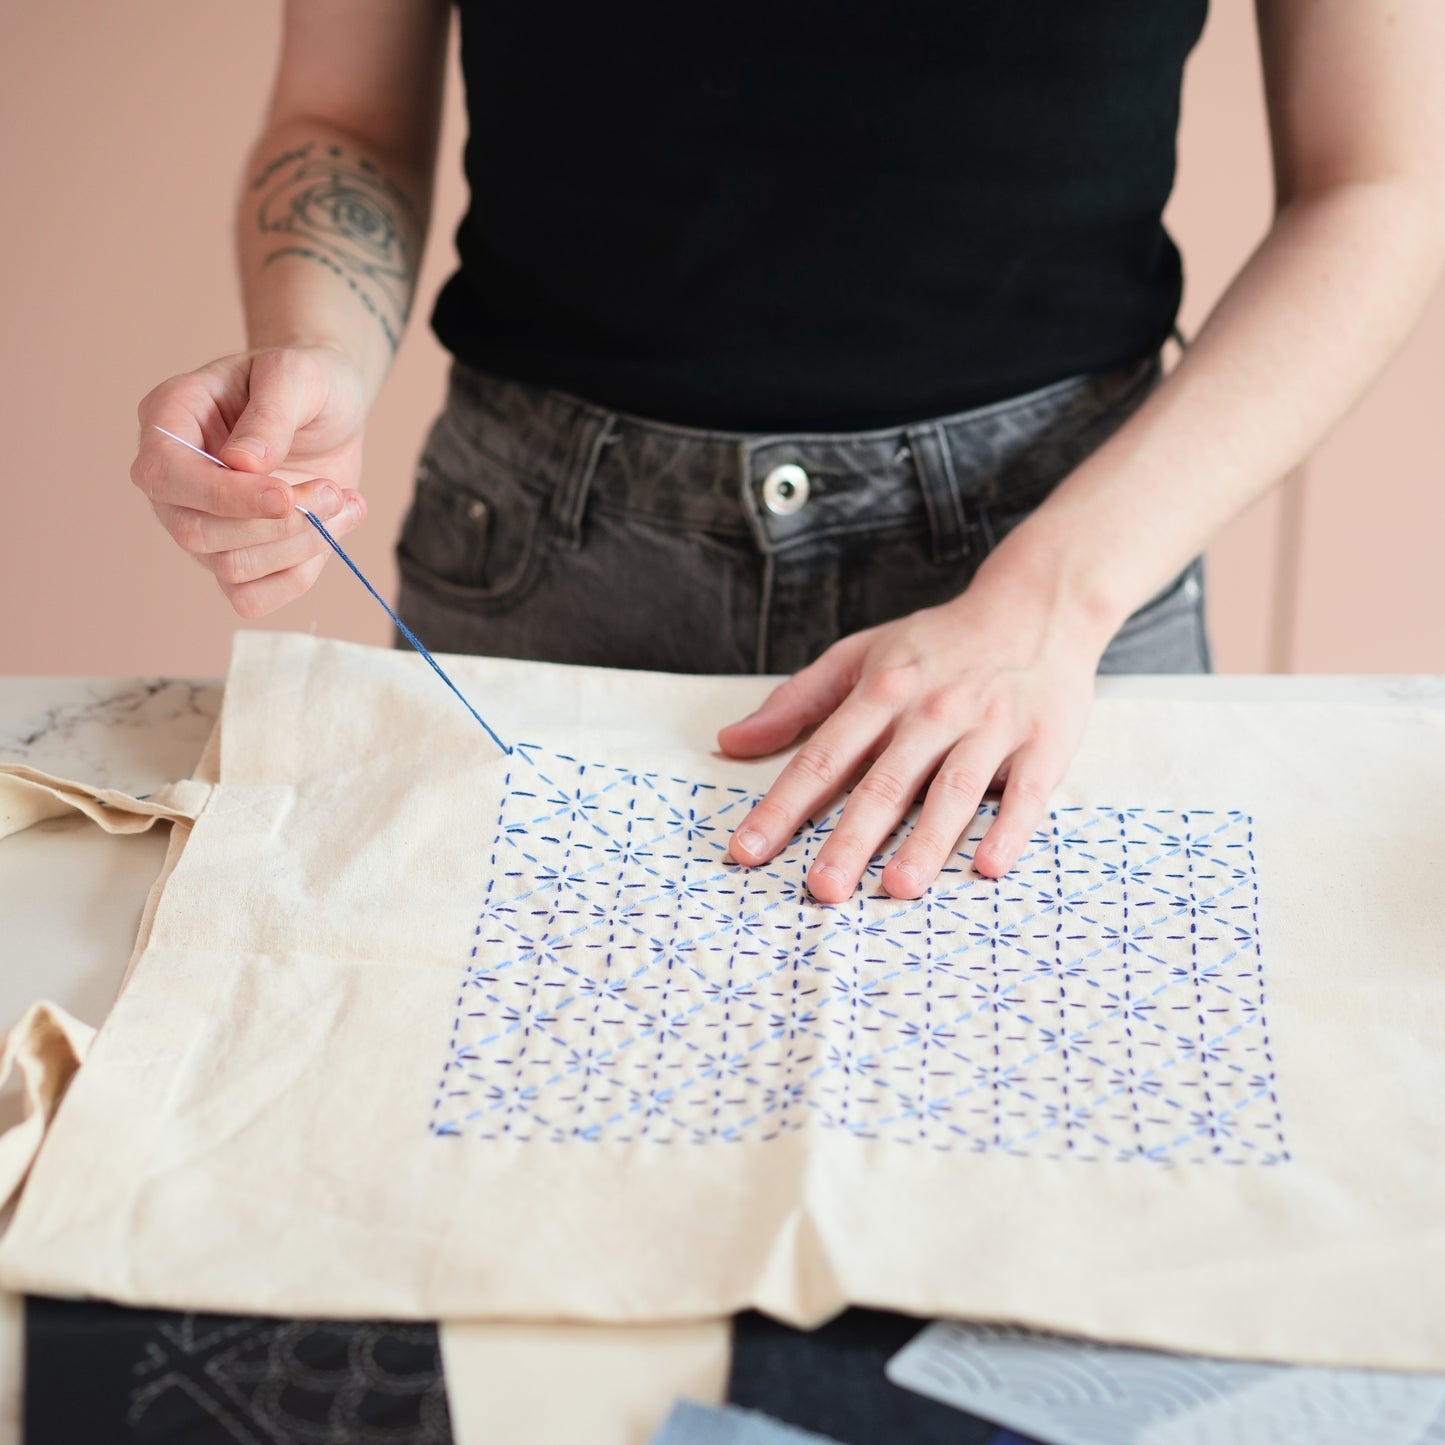
- Use a ruler and pencil to decide where the main structure of your web is going to be. I like to divide mine into eight parts, but feel free to remove or add branches.
- Pick the colour of your thread. I used the same colour as my contrasting fabric. I used the full thread for the main structure of my web, but divided the thread into two strands for the inner circles.
- Sew the straight lines of your structures using the sashiko technique. Make sure the stitches are tight enough to look nice, but not too tight that the fabric pluckers. You can still use the piece of cardboard if you’re worried about sewing the bag shut!
- Every time you reach the spider, you can either knot the thread and restart on the other side, or leave the thread loose on the inside of the bag. Think about what you’d like to use the bag for. Would the thread be likely to get snatched? I’ll be using mine for trick or treating, so I left the thread hanging.
- Once you’ve finished the structure, it’s time to draw the actual web. I find it helpful to draw the first outer circle in pencil to determine the shape I want. I like the edges of my web to be slightly curved inwards as it makes it look more dynamic!
- Sew your web using the same technique as before, circle by circle going inwards. I didn’t let the thread go over my spider to make it look like it’s resting on its web, but you can continue the web of your spider if you like the look of it!
- You’re all done!

Final words
There are still a lot of ways you can personalise your spider tote bag, with more sewing, or even pins or paint! I hope you had fun with this project and that you are proud of your Halloween-themed bag.
Don’t hesitate to tag your finished piece on Instagram, TikTok or Twitter with #ourhands and #madewithourhands, I would love to see your finished results!
See you soon and happy Halloween!